
<=Drag Chain and Wiring. Enclosure=>
Belts.
Best viewed in full screen using the
 button at the right of the bottom toolbar.
Best viewed in full screen using the
button at the right of the bottom toolbar.
Best viewed in full screen using the
button at the right of the bottom toolbar.
Notes Before you start:
- Do not cut the GT2 Belt before reading through these instructions. Each GT2 Belt length will be longer than simply the length of each axis. Each belt needs extra length to wrap around pulleys and hook around belt clips.
- Install the belt as a single long piece and only cut after its been run through and terminated from belt clip to belt clip.
Each of the 3 Belts (X axis and 2 x Y Axis) are installed following these steps.
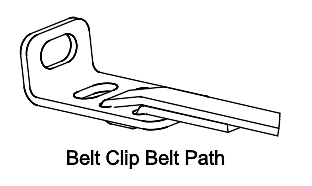
Step 1: Secure belt to one belt clamp
- Remove belt clamp, if already installed.
- Run belt (teeth down) over first slot, down through the second, back up through first.
- Note: Where the belt runs parallel to its self after looping through belt clip, the teeth of the belt should be facing each other and meshing together, this is important to ensure belts do not slip loose.
- Secure belt clamp back back down with belt clamp lip up close against the Y end plate.
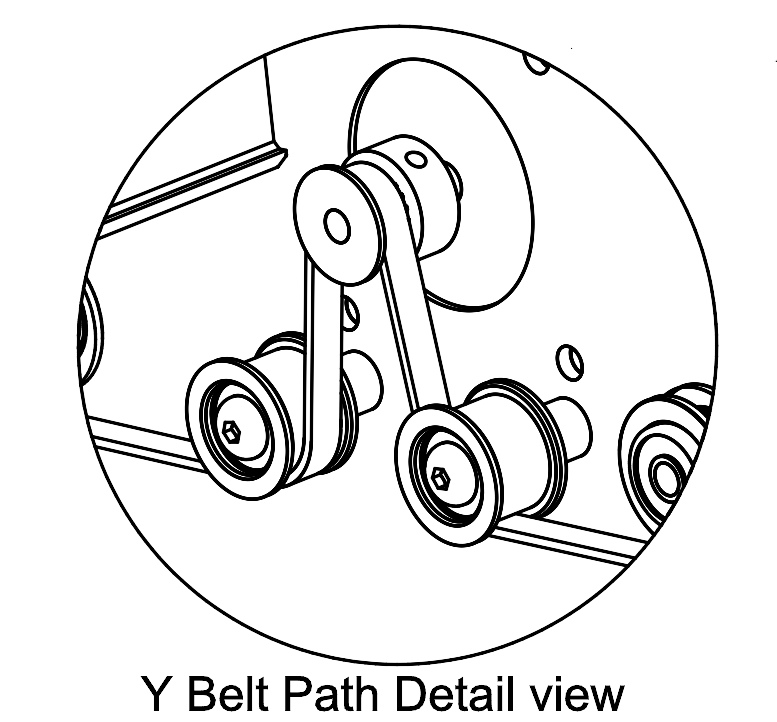
Step 2: Run belt through carriage
- For all of the two Y belts and the X belt, the belt must run under the first delrin idler wheel it meets, then over a pulley, and under the second idler.
- Note: The teeth of the belt and pulley must mesh, if they do not then your belt is upside down.
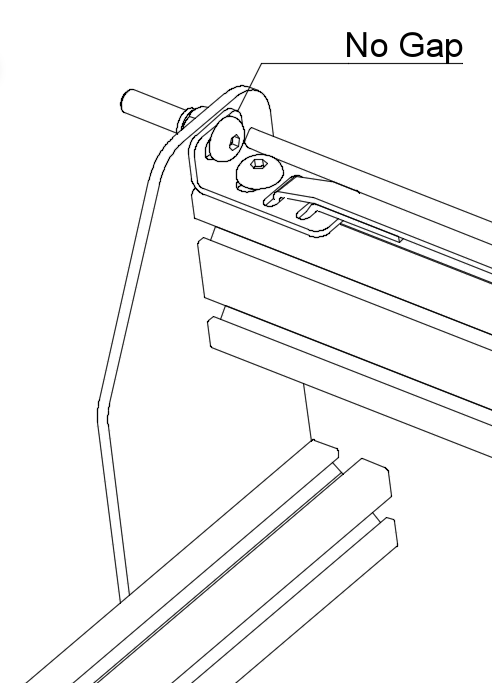
Step 3: Stretch and secure second belt clamp
- Feed the loose end of the belt through the second belt clamp, following the same path as step 1
- Adjust belt in belt clamp so that its 5-10mm short of allowing the belt clamp to rest against the opposite Y gantry plate or Y end plate
- Install and tension the horizontal belt clamp tensioning bolt and nut to stretch the belt, the above mentioned gap does not need to be closed completely.
- When happy with tension, install belt clamp securing bolt into awaiting tee nut in maker slide.
- Note: These do not need to be guitar string tight, over tensioning the belt will risk breaking it, or damaging motor/idler bearings.
- Note: Only now cut the GT2 belt, leaving 30mm only after it exits belt clamp.
Repeat steps 1, 2, & 3 for both Y and the X Belts
<=Drag Chain and Wiring. Enclosure=>