
<=Software Setup..
Machine Configuration.
GRBL AIO Drivers
Depending on your operating system, you will most likely need to download and install a driver.
The GRBL-AIO requires USB Serial drivers to communicate with the system. It uses either the Cypress CP2102 Chipset or the FTDI Chipset .
Please download and install the drivers appropriate for your operating system
AIO Control Boards Up to V1.I CP2102 USB Drivers AIO Control Boards From V1.J on FTDI VCP DriverG Code Streaming and Machine Control
- Download UGS Platform
- Unzip the file and copy the 'UGS platform' folder to your applications, program files, desktop directory - where ever you like to keep things.
- Run UGS platform program
- OSX/Linux you need to run the file named 'ugsplatform', located in the bin directory
- Windows users run the file named 'ugsplatform.exe', also located in the bin directory
If you get an error complaining about Java, you may need to install the latest Java and then open UGS again.
OSX users may see a message about unknown developers, in which case opening 'OSX system preferences', Selecting 'Security and Privacy', and clicking 'open anyway' will enable access to the UGS program now and in the future without warning.
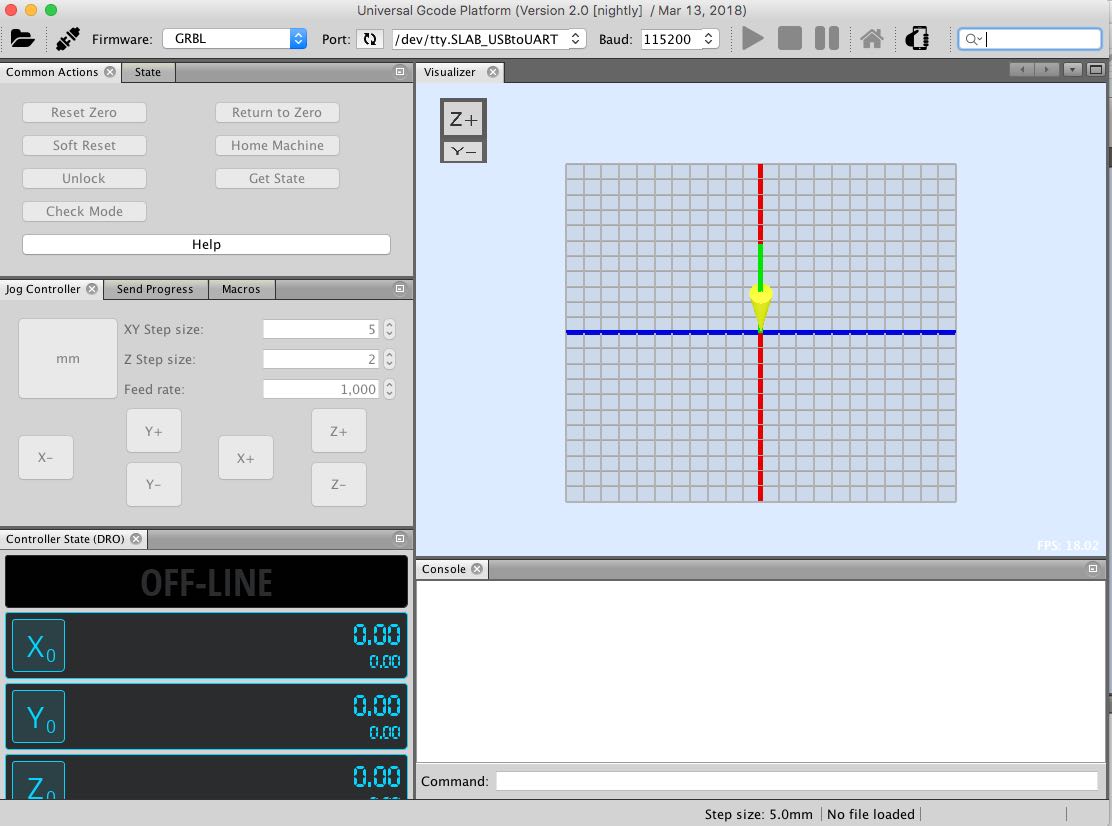
Connect to your machine
Select the port:

- OSX Linux Users with V1.I or lower AIO boards - paste or type /dev/tty.SLAB_USBtoUART into the port drop down box as shown above
- Windows Users, select the comm port that is associated with your machine.
If you have more than one, disconnect the USB lead and hit the refresh button to see which one disappears, This is the one that was associated with the machine. Plug it back in, refresh again and select it
Select the Baud Rate:
Select 115200 as the Baud Rate, as shown below
Open The Connection:

Note, you may only have one connection to the machine open at a time. If your experimenting with Arduino, Serial Application, other senders, or programs like Chilipper or Easel - Make sure these are all closed before trying to connect via UGS
Confirm Connection
In the console at the bottom, you will see text including "Grbl 1.xx $ For Help as per image below." You will also notice that the machine comes online in an alarm state, this is expected and clicking the Unlock button in the top left will clear the alarm. Every time you connect to your machine you must either clear the alarm with Unlock or instead Home Machine - But dont use Home just yet!!!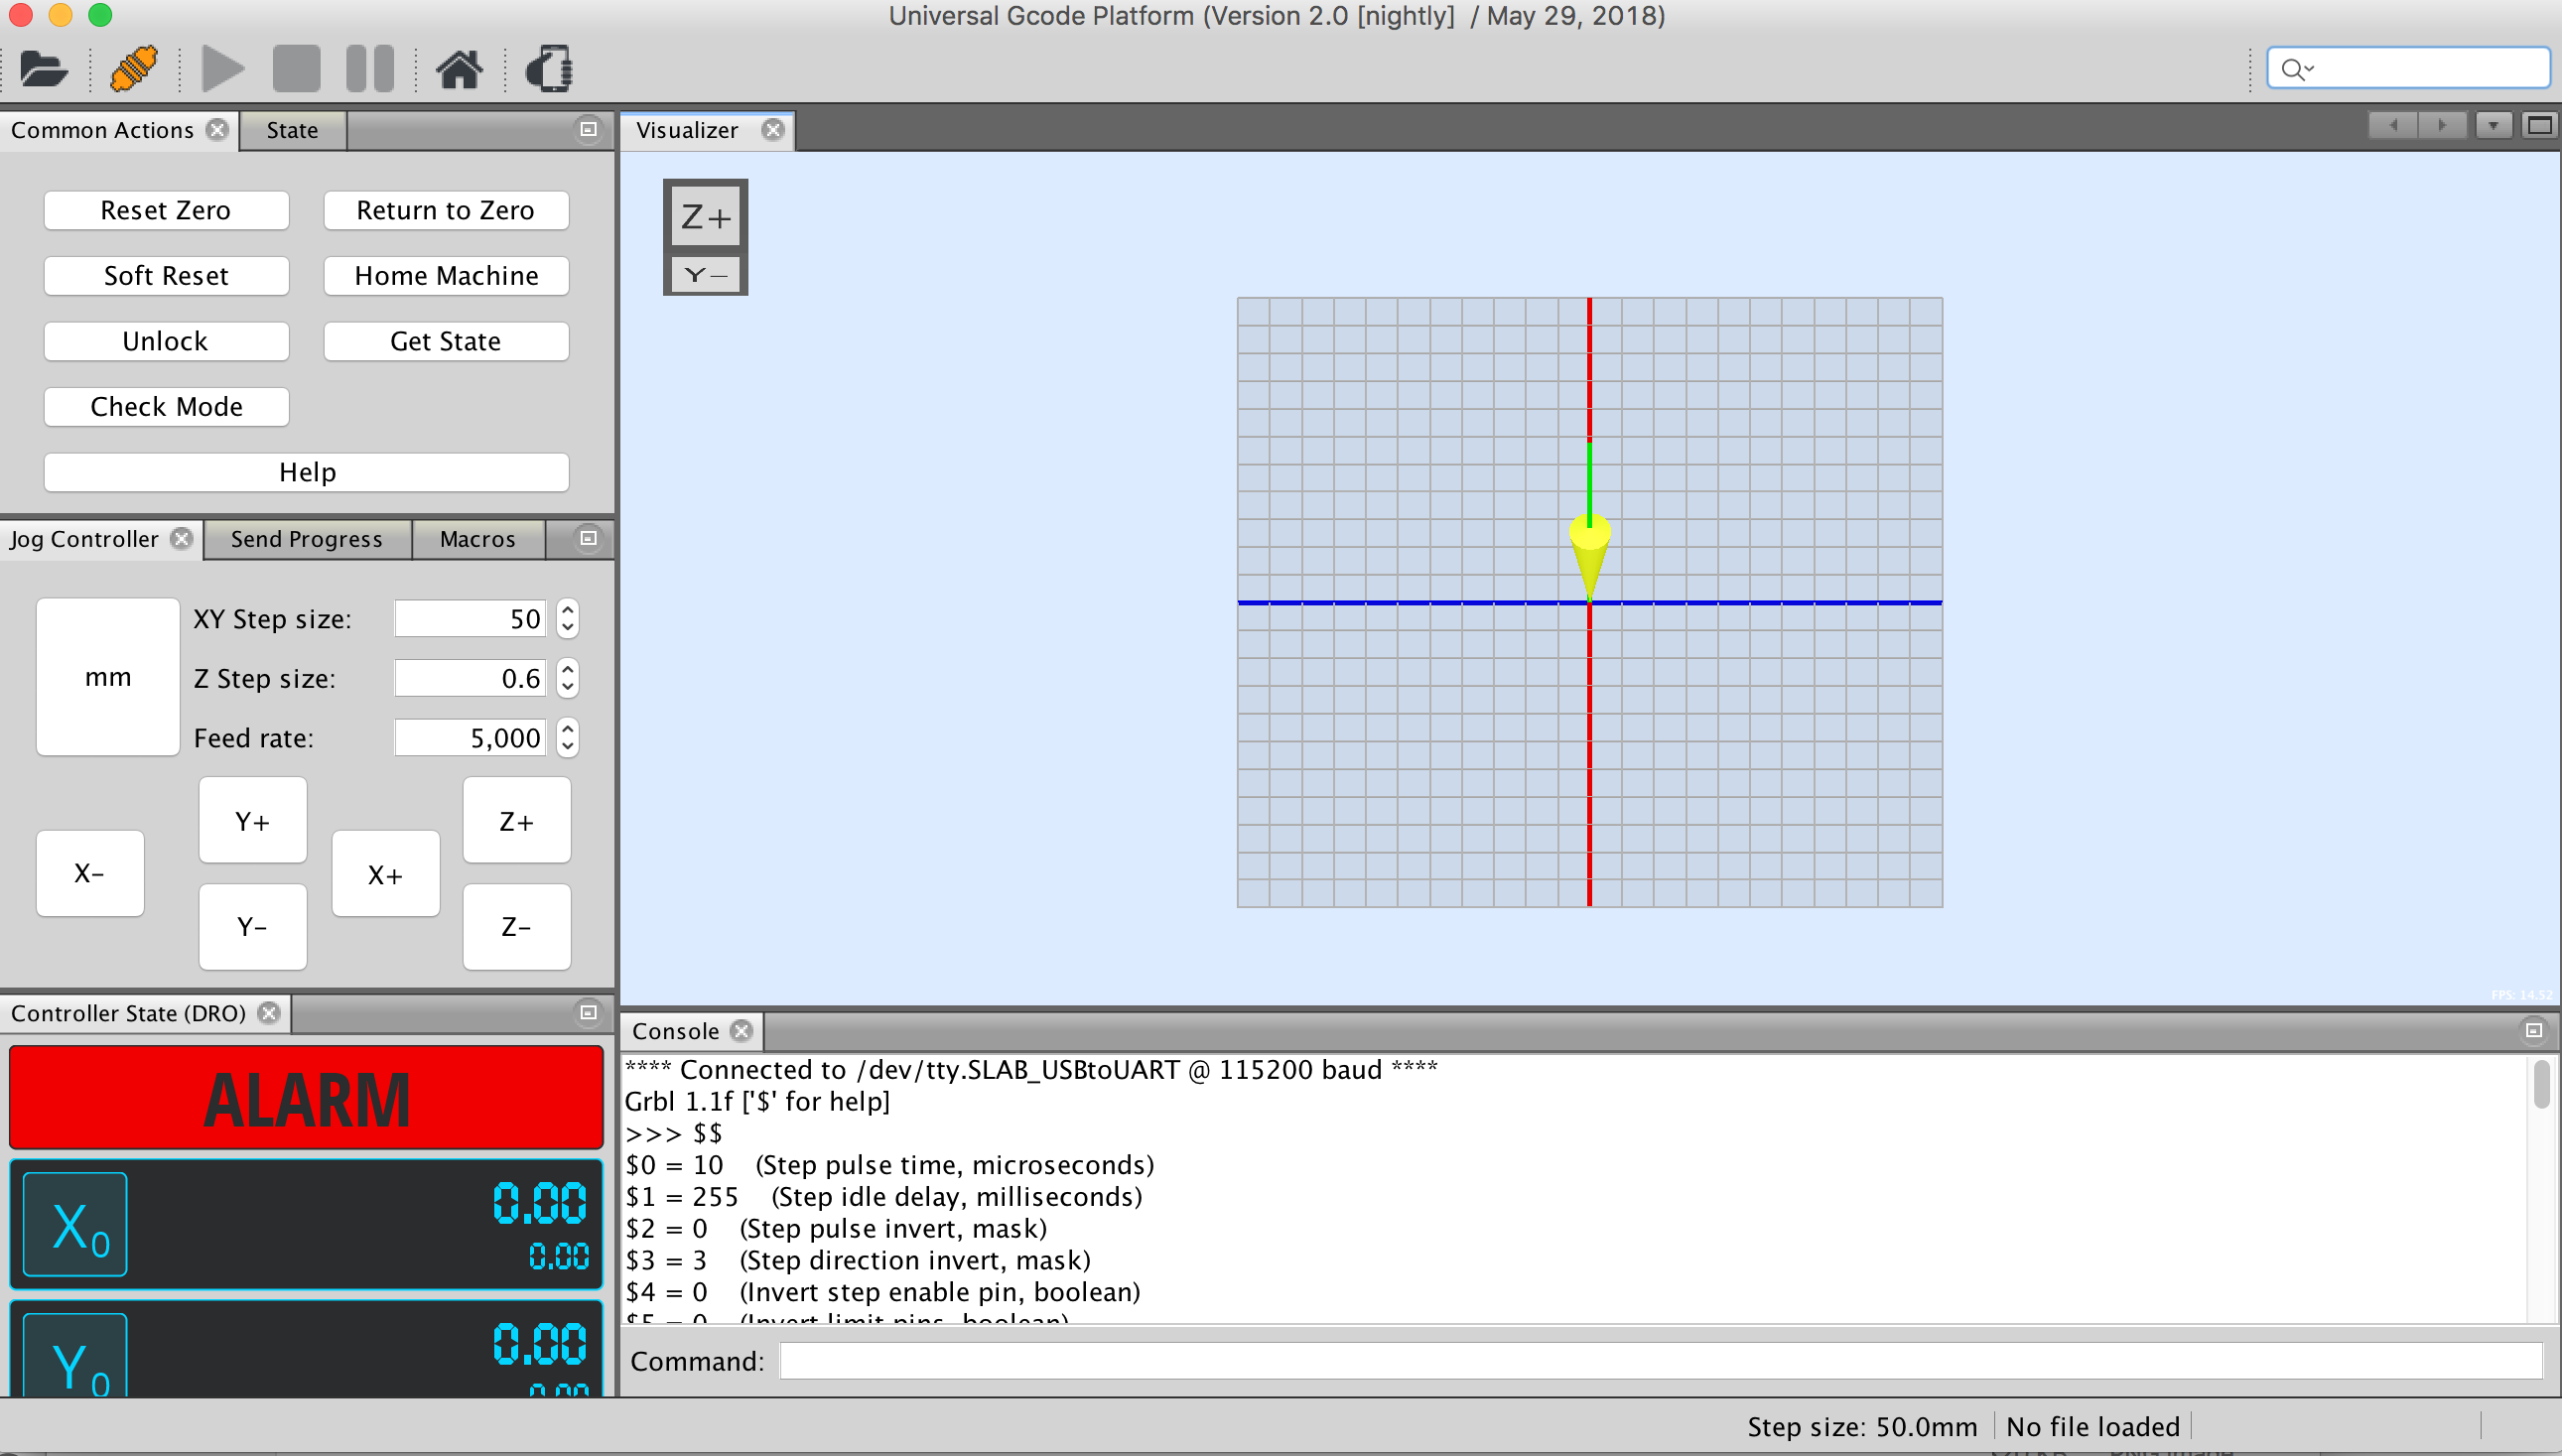
Configure Machine Parameters
Before beginnig the setup wizard, we need to turn of the Hard Limits (limit switch functionality). Open Firmware settings using the 'Machine', 'Firmware Settings' Menu, as per below.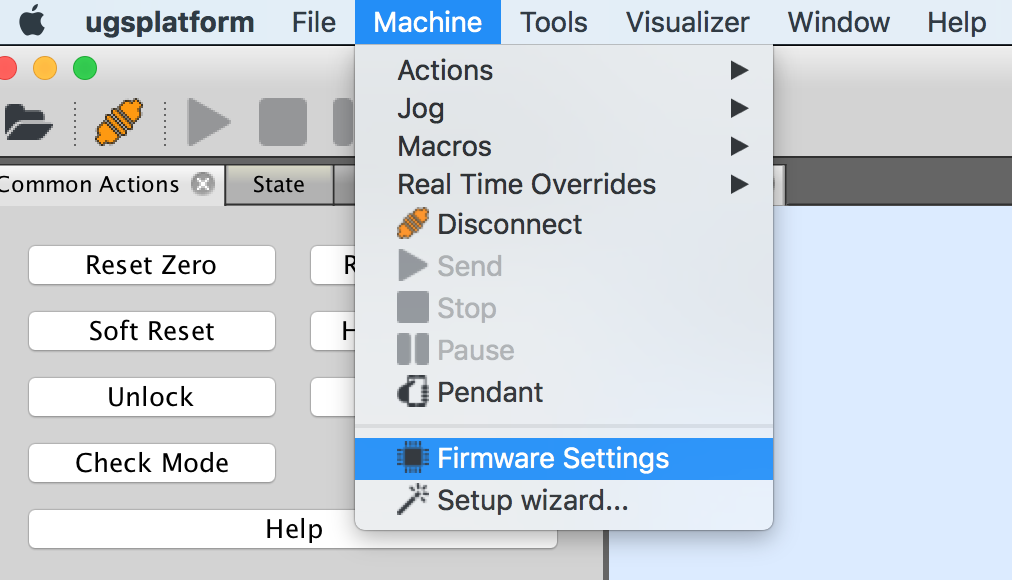
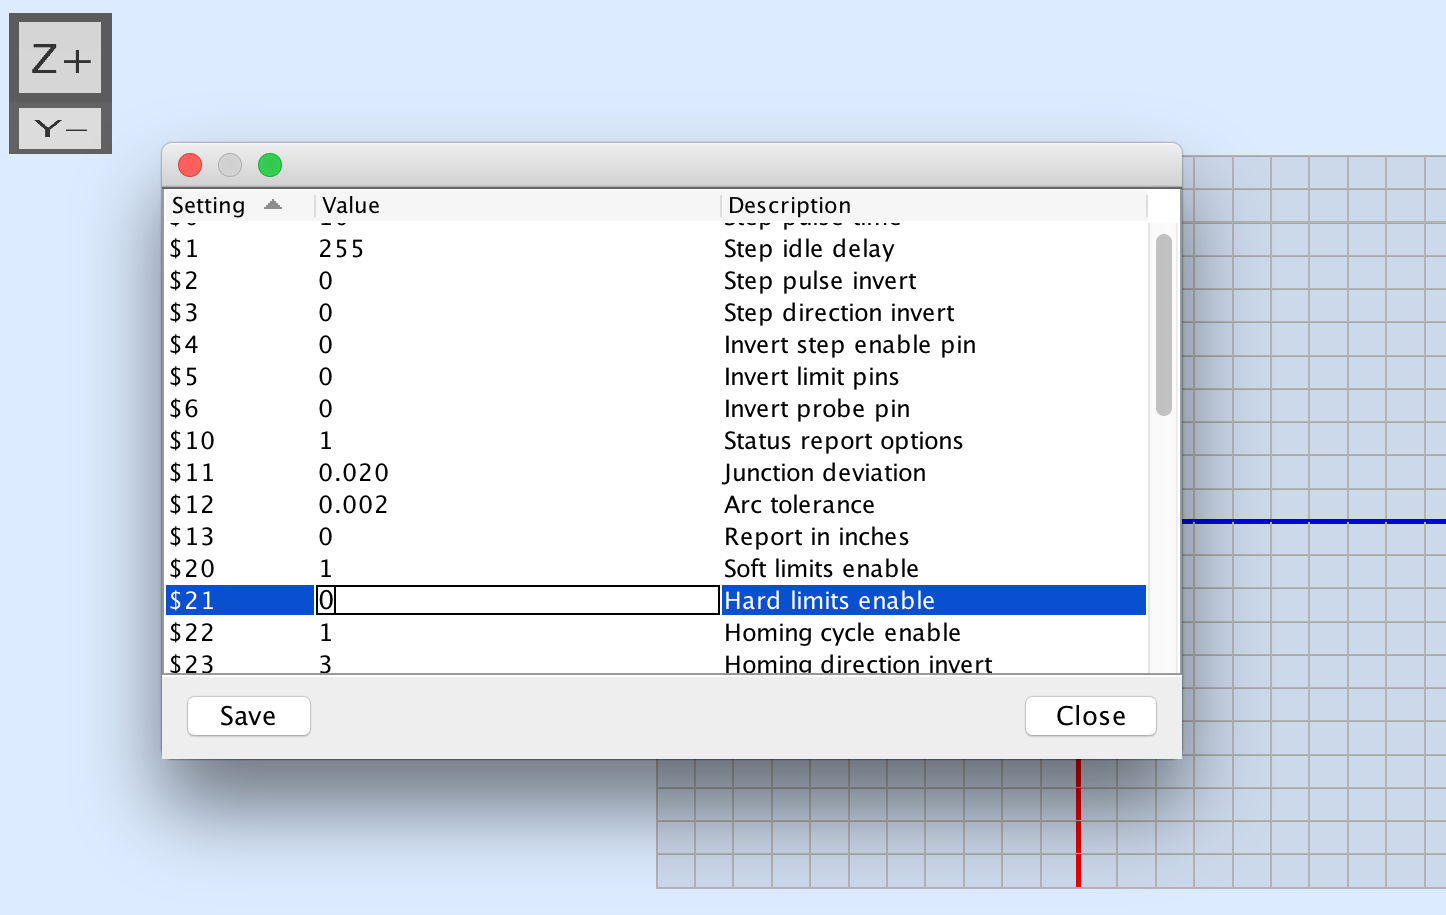
On the settings page, update parameter 21 ('Hard Limits Enable') to be 0, as per the image below. Save and Close.
Click to enlarge
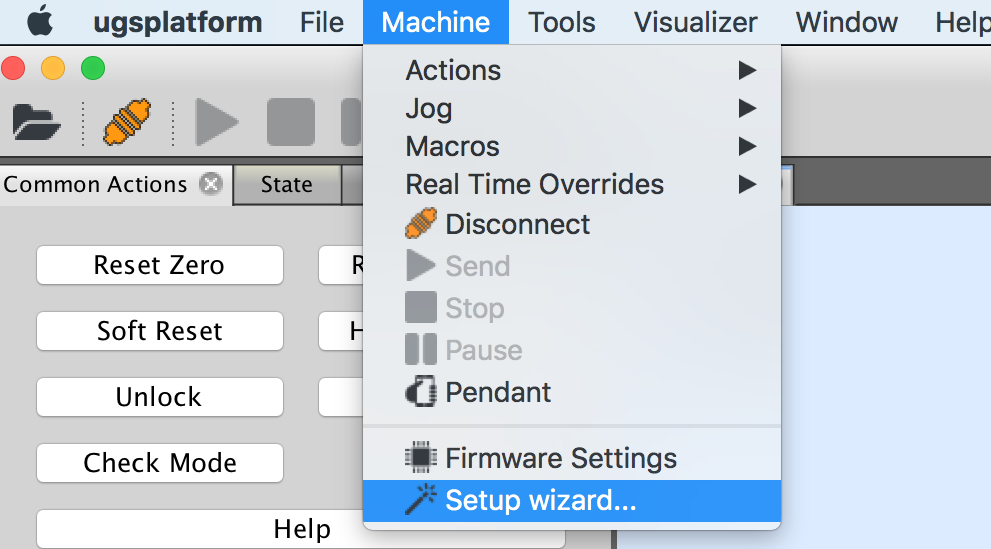
On the Machine Menu, Select Setup Wizard.
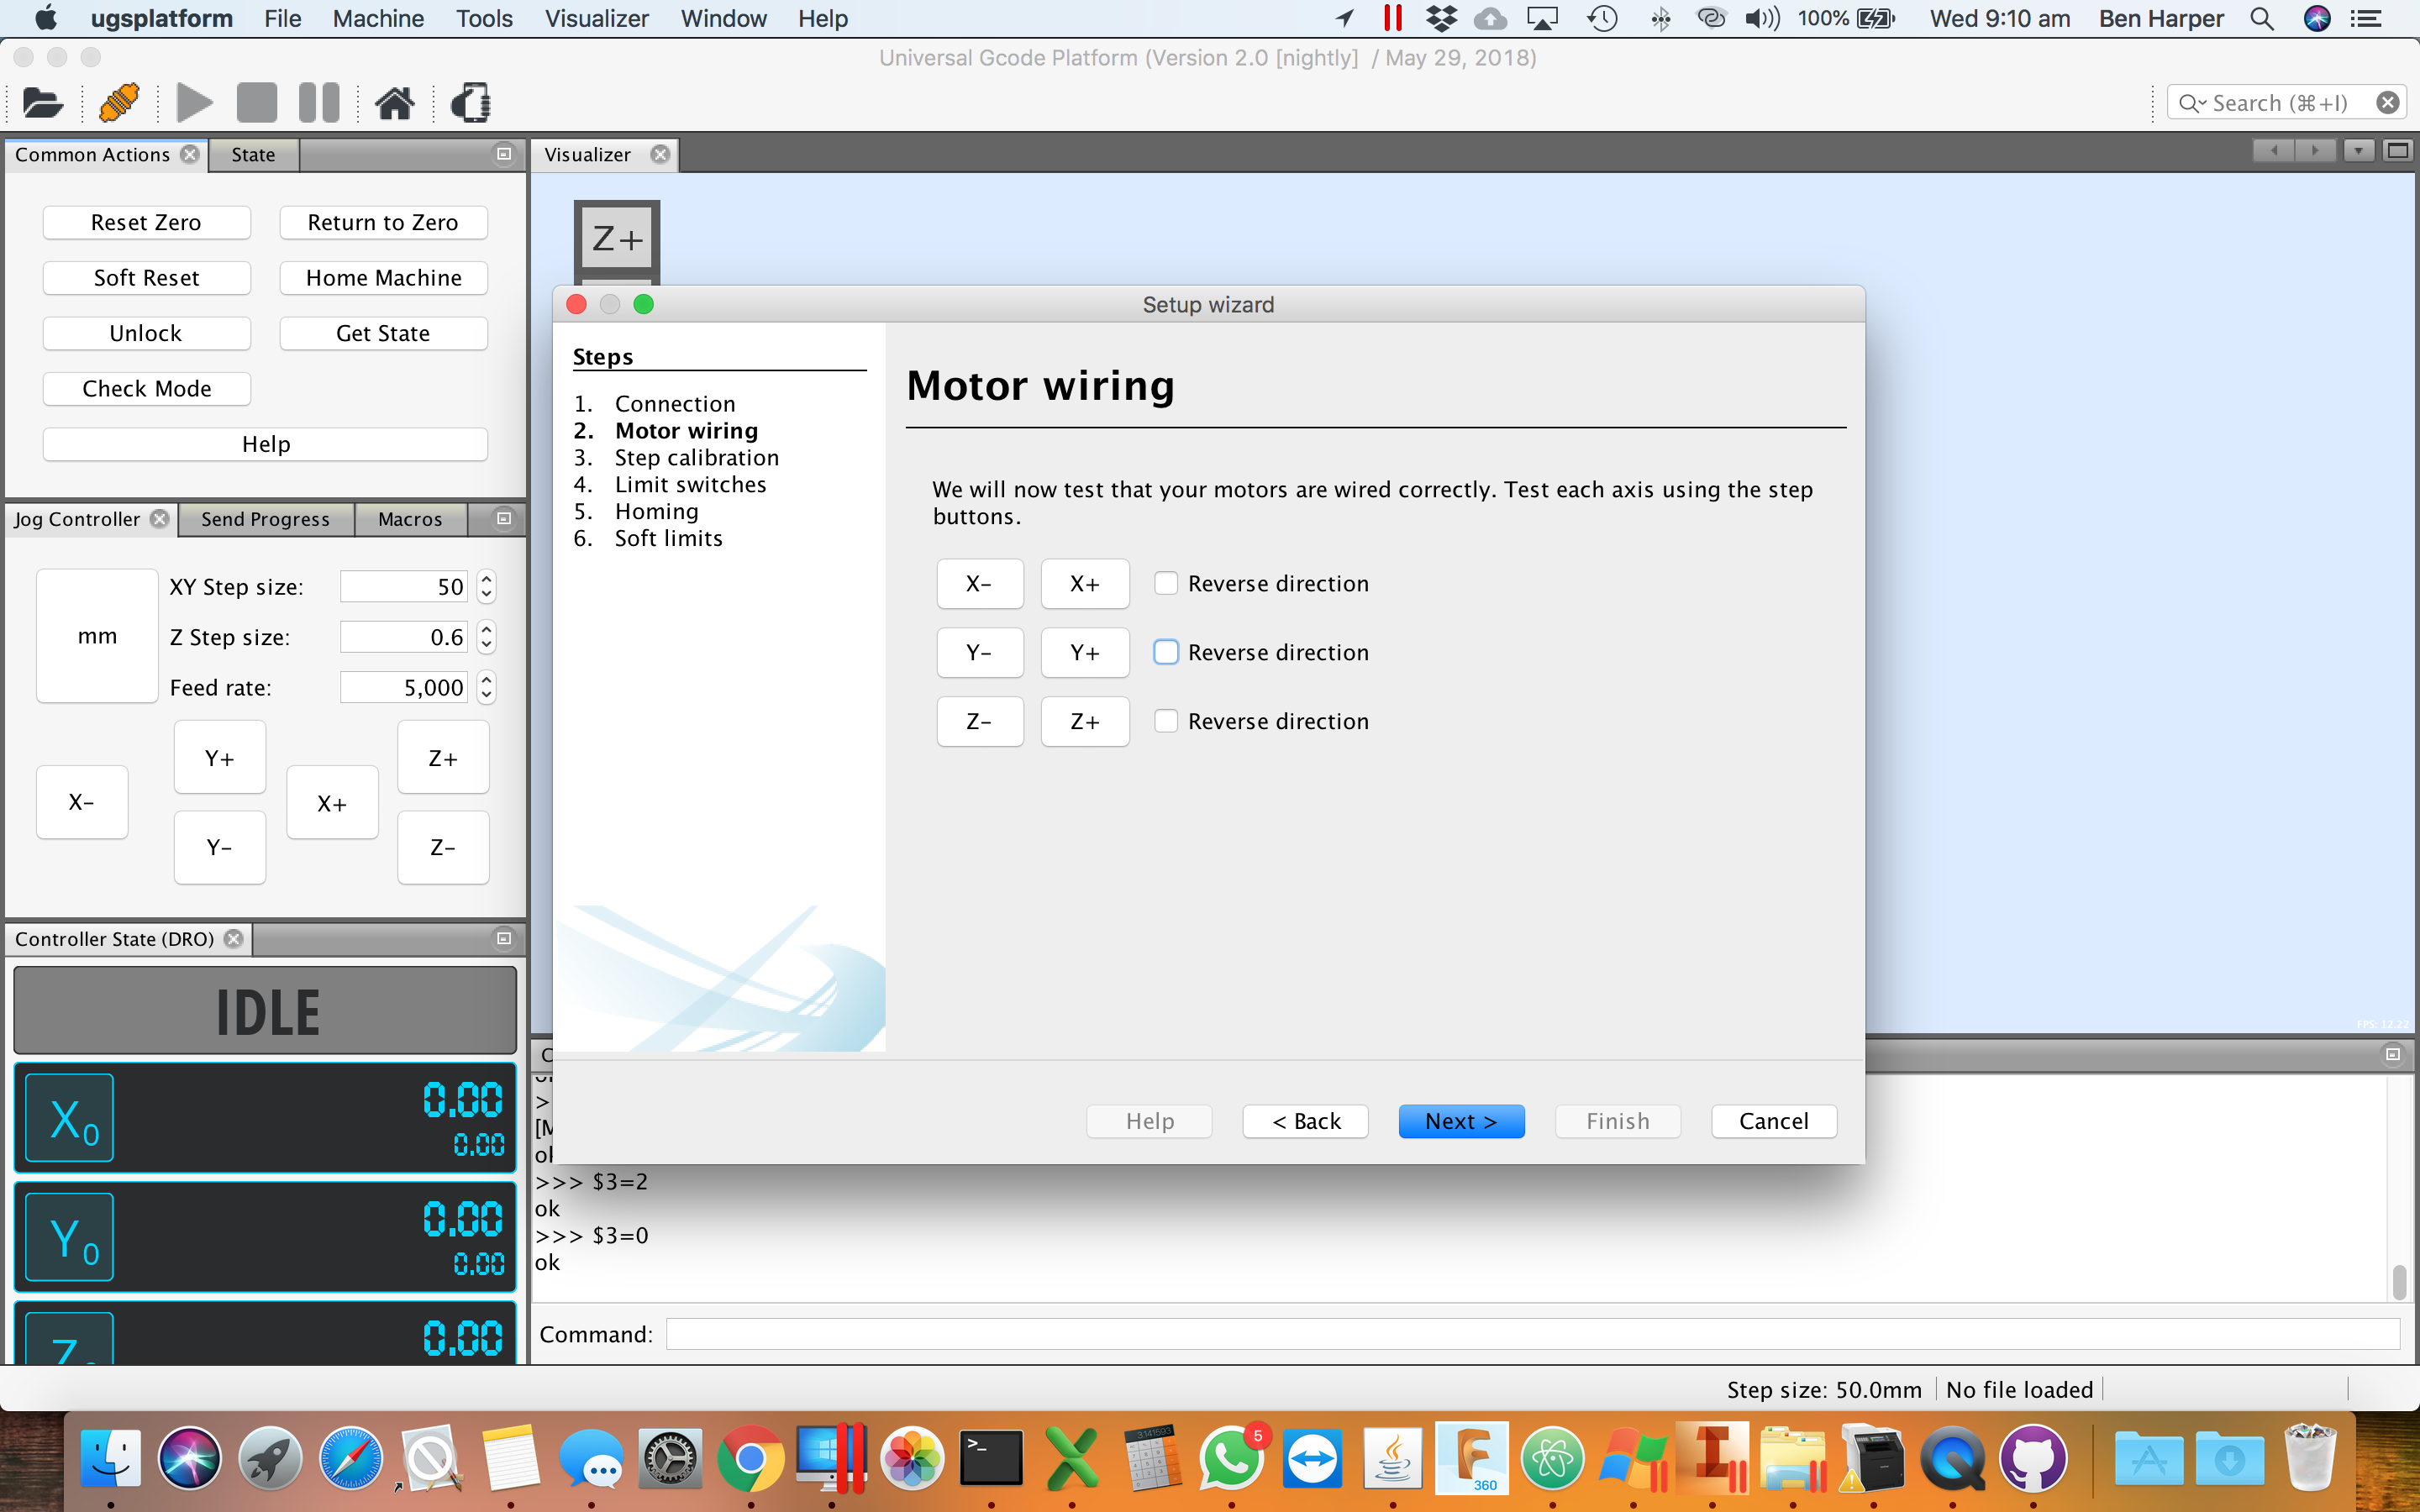
Motor Wiring Step.
Use the X, Y, & Z +/- buttons to jog the machine around.
You should see the X+ move to the right, Y+ move backwards, and Z + move up. If you find any axis doing the opposite, just put a tick in the 'reverse direction' tickbox for that axis.
Click image to enlarge
Use the X, Y, & Z +/- buttons to jog the machine around.
You should see the X+ move to the right, Y+ move backwards, and Z + move up. If you find any axis doing the opposite, just put a tick in the 'reverse direction' tickbox for that axis.
Click image to enlarge
You should not need to change anything in the step per mm screen.

Click image to enlarge
Click image to enlarge
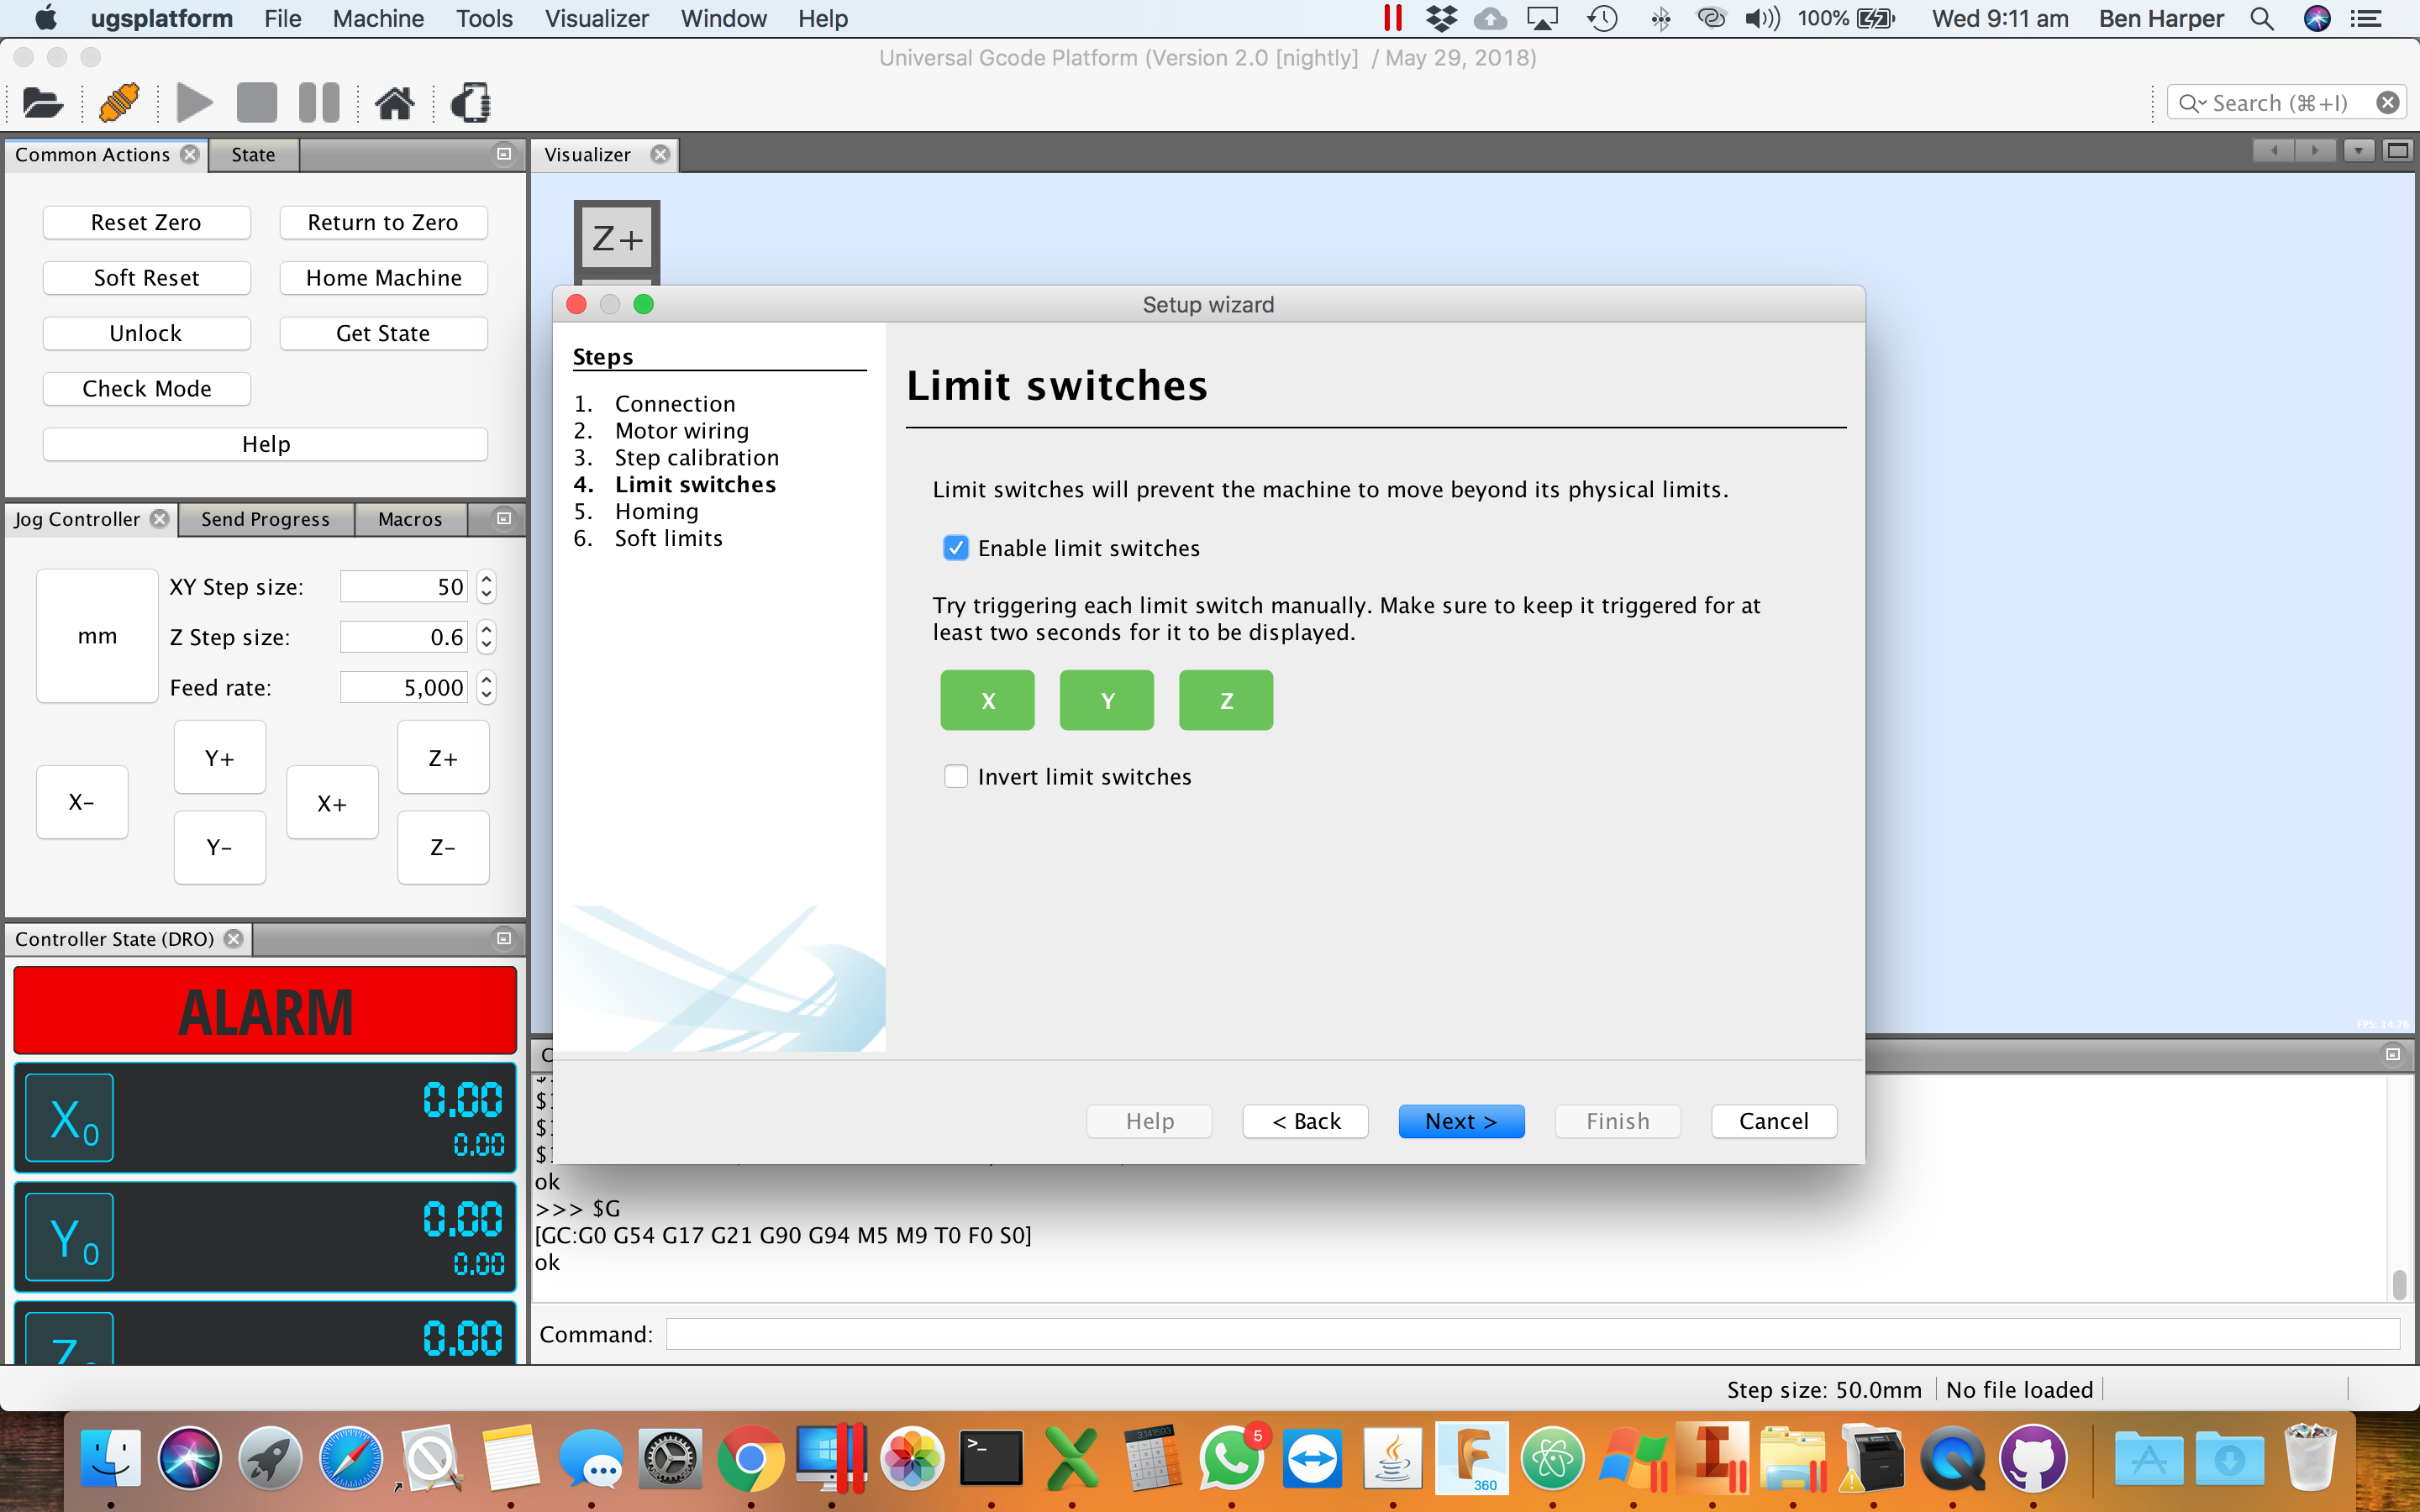
Press each limit switch with your hand and check that the appropriate axis label lights up, should it not go back and check the Limit switch wiring step.
Click image to enlarge
Click image to enlarge
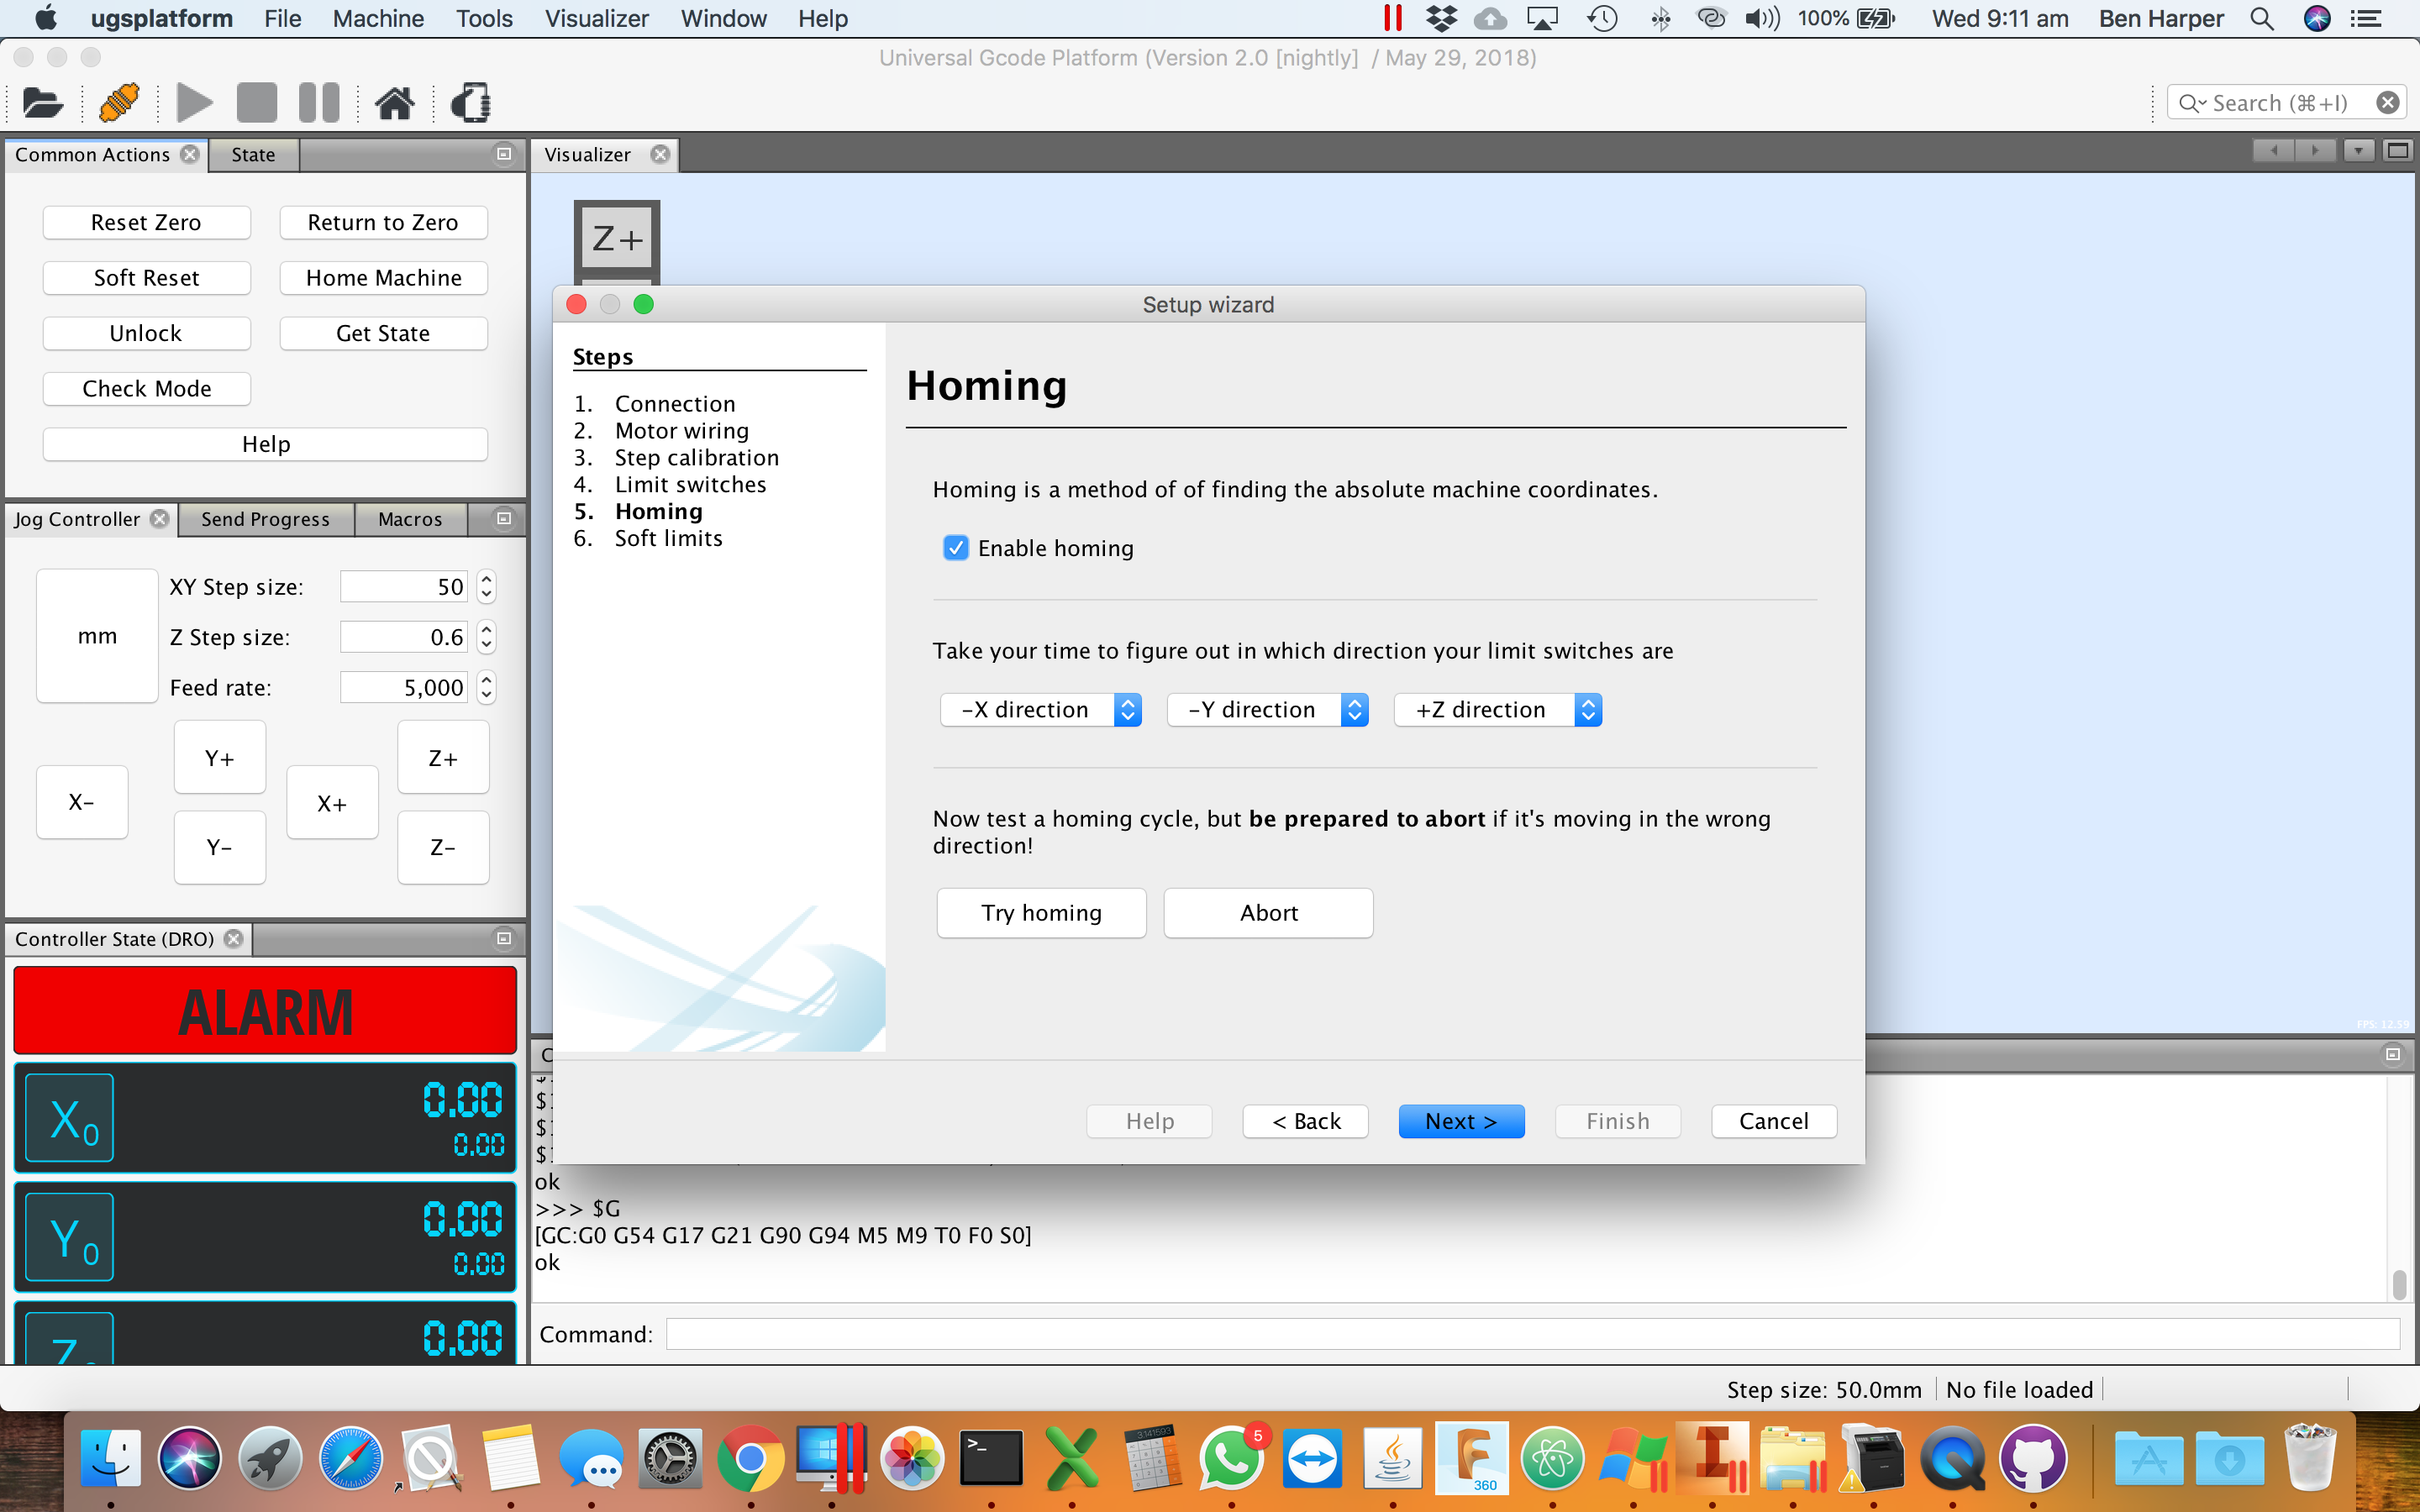
The Homing Wizard will take you through a homing cycle, if your machine does not head up on the Z Axis, and forwards to the lft on your XY axis, you can adjust the directions here. You should not need to though!
Click to enlarge
Click to enlarge
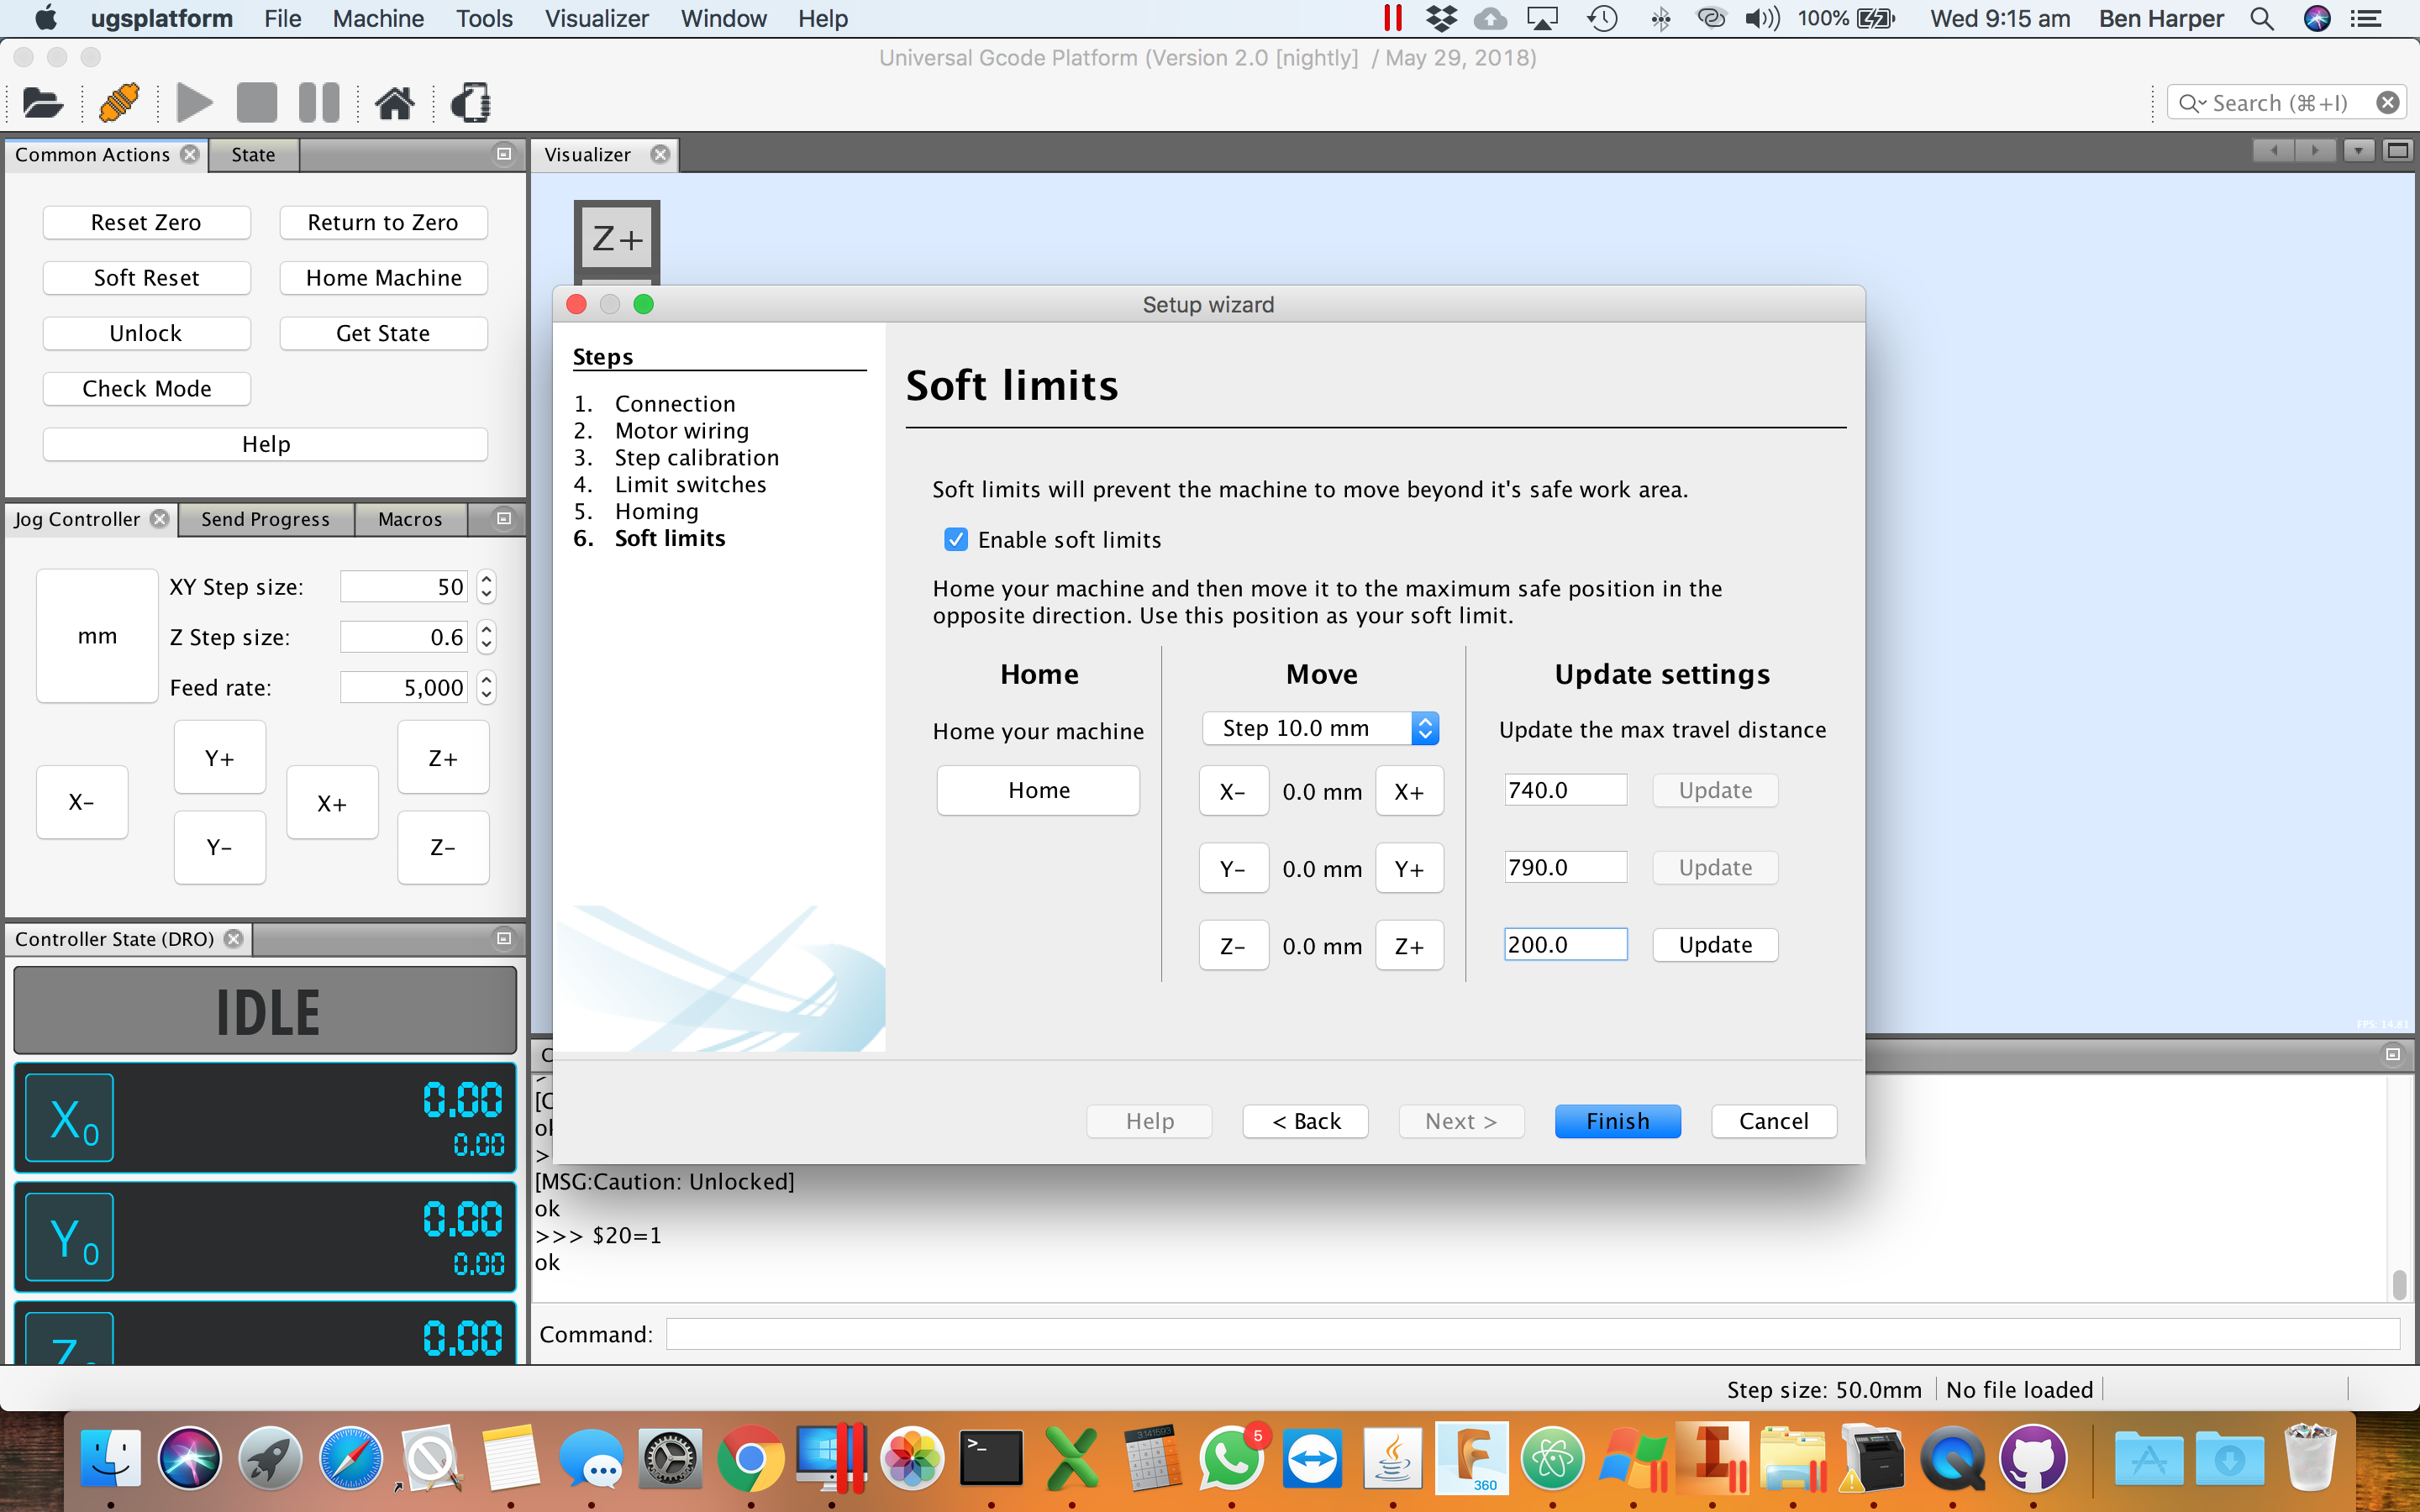
The X & Y soft limits settigs should not need updating, change Z to 200 if it is not already. And put a check in 'Enable Soft Limits'
Click image to enlarge
Click image to enlarge
Your machine is almost configured, all that is left to do is go back into the Firmware settings and put a 1 back in
$21 parameter to turn back on the Hard Limits (limit switch functionality).
Open Firmware settings using the 'Machine', 'Firmware Settings' Menu, as per below.
On the settings page, update parameter 21 ('Hard Limits Enable') to be 1! Save and Close.
On the settings page, update parameter 21 ('Hard Limits Enable') to be 1! Save and Close.
From here we are setup and its time to fire up which ever CAD Cam program you have decided to use, some good options are listed on the previous page.
Please contact 3DTek (support@3dtek.xyz) if you would like to discuss your chosen option and get some tips on the workflows.
Please contact 3DTek (support@3dtek.xyz) if you would like to discuss your chosen option and get some tips on the workflows.
<=Software Setup..